

User guide3 min
Put your own brand on the reports
Set your logo, colours and contact details once, in the Branding view of the workspace sidebar. Every report downloaded from any site in the workspace then carries them. Included from Pro up.
Looking for the reports themselves?
How to get there#
Open Branding in the workspace sidebar, below Workspace alerts.
- 1
Go to the workspace
Click the PixyScan mark at the top left, so that no site is open.
- 2
Choose Branding in the workspace sidebar
It sits between Workspace alerts and the Settings group. The view holds a single branding form.
app.pixyscan.com/w/…/reports
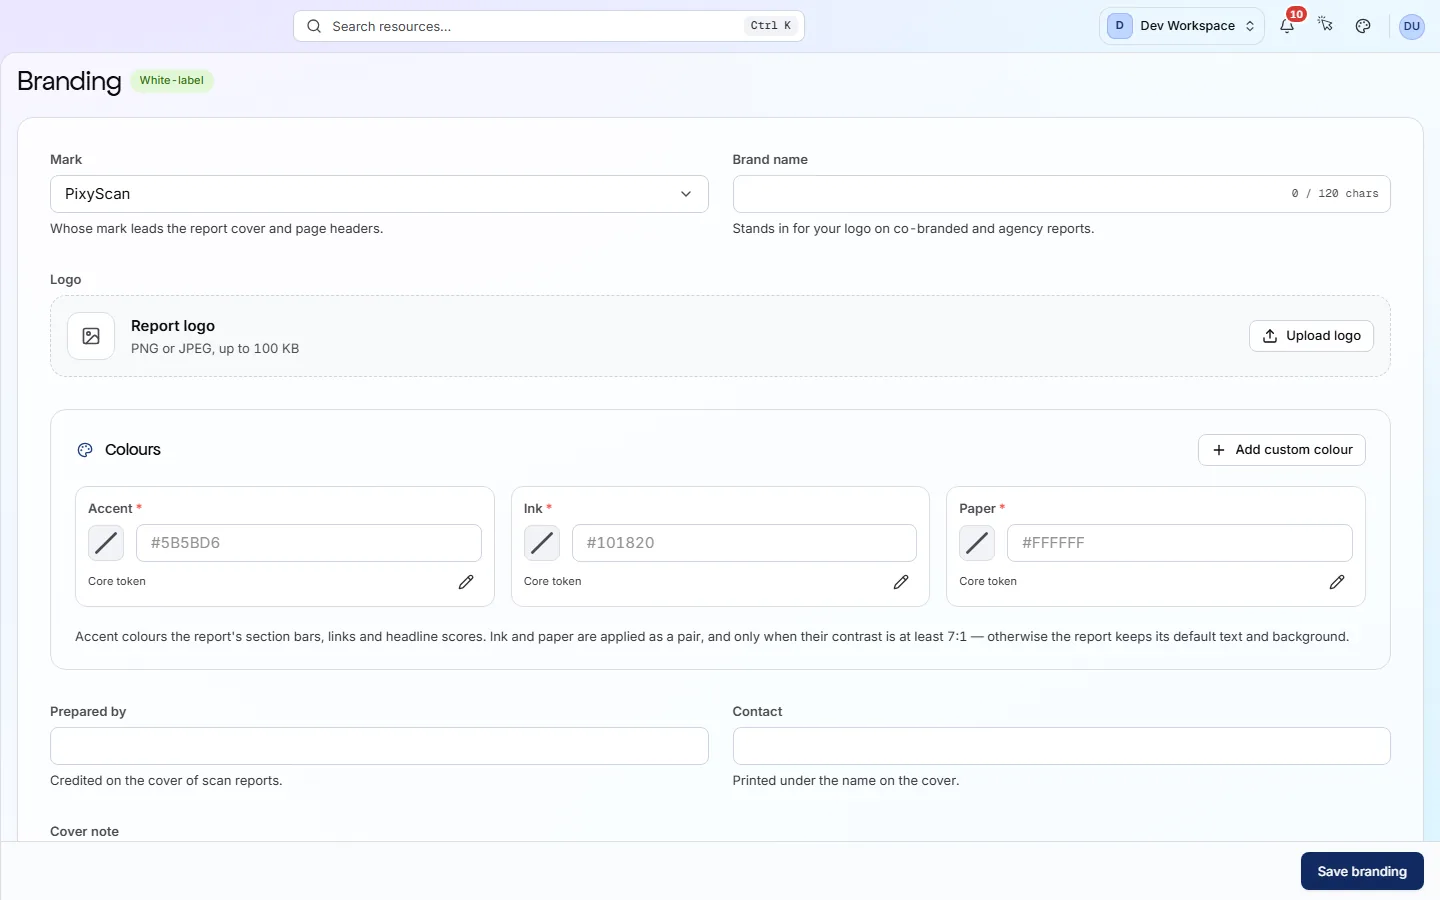
What each field does#
Accent, Ink and Paper must each hold a hex colour. Every other field is optional. Fill in what you want, then press Save branding.
Can't edit the fields? Only the workspace's Super Admin can. For everyone else they are read-only.
Does my tier include branding? Check the badge beside the heading. White-label means yes. Any other badge means your tier does not include it. Below Pro, the badge reads Not in plan and the form is replaced by a card with an Upgrade plan button.
| Field | Default | What it does |
|---|---|---|
| Mark | PixyScan | Whose brand the report carries. PixyScan uses our mark, Co-branded puts your logo beside ours, and Agency shows only your brand, with no PixyScan mark anywhere in the report. |
| Logo | - | Your logo image. Press Upload logo and choose a PNG or JPEG file of up to 100 KB. |
| Brand name | - | The name printed beside the mark, such as your agency's name. |
| Accent | - | The highlight colour used for headings, bars and lines, as a hex code. Required. PixyScan's own is #5B5BD6. |
| Ink | - | The colour of the body text, as a hex code. Required. PixyScan's own is #101820. |
| Paper | - | The page background colour, as a hex code. Required. PixyScan's own is #FFFFFF. Ink on paper needs a contrast of at least 7:1. |
| Prepared by | - | Who the report is from, such as your name or your agency's name. |
| Contact number | - | A phone number the reader can reach whoever prepared the report on, such as +1 555 010 0199. |
| Cover note | - | A short note of up to 600 characters on the first page, for example a summary for your client. |
| Footer | - | A line printed on every page, such as a confidentiality notice. |
You do not need to scan again
What happens if I downgrade below Pro?
Does something here not match what you see in the app? Tell us